
There are recipes that are nice to have, and then there are recipes you make once and immediately think, “Why was I buying bread all this time?”
This easy homemade bread is one of those recipes for me.
I usually mix everything together in one bowl, cover it, and let the yeast do all the hard work. There’s no kneading, no eggs, no butter, and no fancy mixer required. Honestly, it couldn’t be much easier.
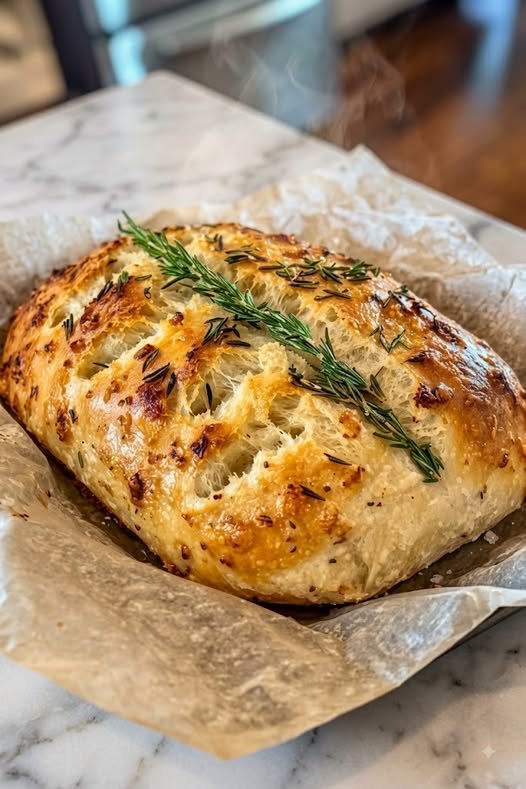
The outside comes out beautifully golden and crisp, while the inside is soft, airy, and chewy. I love adding a little rosemary and garlic for extra flavor, but you can absolutely keep it plain for an everyday loaf.
And because the ingredients are inexpensive and simple, this is a great recipe when you want fresh bread without spending much money.
Ingredients
- 3 cups (375g) all-purpose flour
- 1½ cups (360ml) warm water
- 1½ teaspoons salt
- 1 teaspoon sugar
- 1 teaspoon instant or active dry yeast
- 1 tablespoon olive oil, optional
- 1 teaspoon dried rosemary, optional
- ½ teaspoon dried thyme, optional
- 1–2 cloves garlic, finely minced, optional
For the Top
- Fresh rosemary
- A pinch of coarse salt
- 1 teaspoon olive oil, optional
Step-by-Step Method
1. Combine the dry ingredients
In a large bowl, add the flour, yeast, sugar, salt, rosemary, and thyme.
Give everything a quick stir to distribute the ingredients evenly.
2. Add the water
Pour in the warm water and olive oil, if using.
Using a wooden spoon or spatula, mix until everything comes together into a sticky, shaggy dough.
Don’t worry if it doesn’t look smooth. That’s exactly what you want for a no-knead loaf.
3. Let the dough rise
Cover the bowl with plastic wrap or a clean kitchen towel.
Leave it somewhere warm for approximately 1½–2 hours, or until the dough has doubled in size and looks bubbly.
If you have more time, you can refrigerate the dough overnight. I actually prefer this method when I remember to plan ahead because the longer fermentation gives the bread wonderful flavor.
4. Shape the loaf
Lightly flour your work surface and gently transfer the dough onto it.
With lightly floured hands, fold the dough over itself a few times and shape it into a round or oval loaf.
There’s no kneading needed—just a few gentle folds to bring everything together.
5. Prepare the oven
Place a Dutch oven or heavy oven-safe pot with a lid into your oven.
Preheat the oven to 450°F (230°C) for about 25–30 minutes.
A properly heated pot helps create that beautiful crust and steamy interior.
6. Add the bread
Carefully remove the hot pot from the oven.
Place the dough inside. If you like, score the top with a sharp knife and sprinkle over fresh rosemary and a little coarse salt.
Be very careful because the pot will be extremely hot.
7. Bake
Cover with the lid and bake for 25–30 minutes.
Then carefully remove the lid and bake for another 10–15 minutes, until the loaf is deeply golden brown and crisp.
The exact time can vary slightly depending on your oven.
8. Let it cool
Transfer the bread to a wire rack and let it cool for at least 30 minutes before slicing.
I know it’s tempting to cut into it immediately—especially when the whole kitchen smells amazing—but letting it rest gives the crumb time to finish setting.
Cooking Tips for Perfect No-Knead Bread
Don’t panic about sticky dough
This dough is supposed to be sticky. Avoid adding lots of extra flour, or your bread may turn out heavy.
Use warm water
The water should feel warm rather than hot. Very hot water can interfere with the yeast.
Give the dough enough time
If your kitchen is cool, the dough may need longer than two hours to double.
Preheat the Dutch oven
This is one of my biggest tips. A hot Dutch oven helps produce that gorgeous crispy crust.
Try an overnight rise
For deeper flavor, cover the mixed dough and let it rise slowly in the refrigerator overnight.
Don’t slice too soon
Allowing the bread to cool helps prevent a gummy center.
Can I Make This Bread Without a Dutch Oven?
Yes!
A Dutch oven is my favorite method because the covered pot traps steam and helps create a fantastic crust. But if you don’t have one, you can bake the dough on a preheated baking sheet or baking stone.
You can also place a heatproof pan of hot water in the oven to create steam during the first part of baking.
Serving Suggestions
This bread is one of those things that goes with practically everything.
I usually serve warm slices with:
- Butter or olive oil
- Garlic butter
- Soup or stew
- Scrambled eggs
- Cheese and deli meats
- Avocado
- Jam or honey
- Pasta
- Roasted chicken
- Fresh salads
For a quick snack, toast a slice, rub it with fresh garlic, drizzle with olive oil, and sprinkle with a little salt. So simple and so good!
How to Store Homemade Bread
Once completely cool, keep the bread at room temperature in a bread bag or loosely wrapped for 2–3 days.
For longer storage, slice the loaf and freeze the slices in a freezer-safe bag for up to 2–3 months.
You can toast individual slices straight from frozen, which is especially convenient for breakfast.
Approximate Nutrition Per Serving
Based on 10 servings per loaf. Nutrition will vary depending on the exact ingredients used.
- Calories: 155
- Protein: 4g
- Carbohydrates: 29g
- Fat: 2g
- Fiber: 1g
- Sugar: 1g
- Sodium: 350mg
Frequently Asked Questions
1. Can I make this bread without eggs?
Absolutely! There are no eggs in this recipe. The yeast and proper fermentation provide the rise and texture.
2. Can I make it without butter?
Yes. This recipe doesn’t require butter at all. A little olive oil is optional and can be left out if you prefer.
3. Why doesn’t this bread need kneading?
The long resting time allows the flour to hydrate and the yeast to develop the dough’s structure. A few gentle folds are enough to bring the dough together.
4. Can I use whole wheat flour?
Yes, but I recommend replacing only part of the all-purpose flour with whole wheat flour. Using too much whole wheat can make the loaf heavier and may require additional water.
5. How do I know when the bread is fully baked?
The loaf should have a deep golden-brown crust and sound hollow when tapped on the bottom. If you have a thermometer, the center should generally be around 200–210°F (93–99°C).
Final Thoughts
If you’ve been intimidated by homemade bread, this is the recipe I’d start with.
It’s inexpensive, forgiving, and requires almost no hands-on work. I usually mix it up, let it rise, and then let the oven take care of the rest. The reward is a gorgeous loaf with a crisp crust and soft, airy center.
Honestly, once you smell this bread baking in your kitchen, you may understand why I don’t buy bread anymore! 🥖❤️