
Introduction
There are some dinners that just feel like home, and this crispy garlic-braised chicken thighs recipe is one of them.
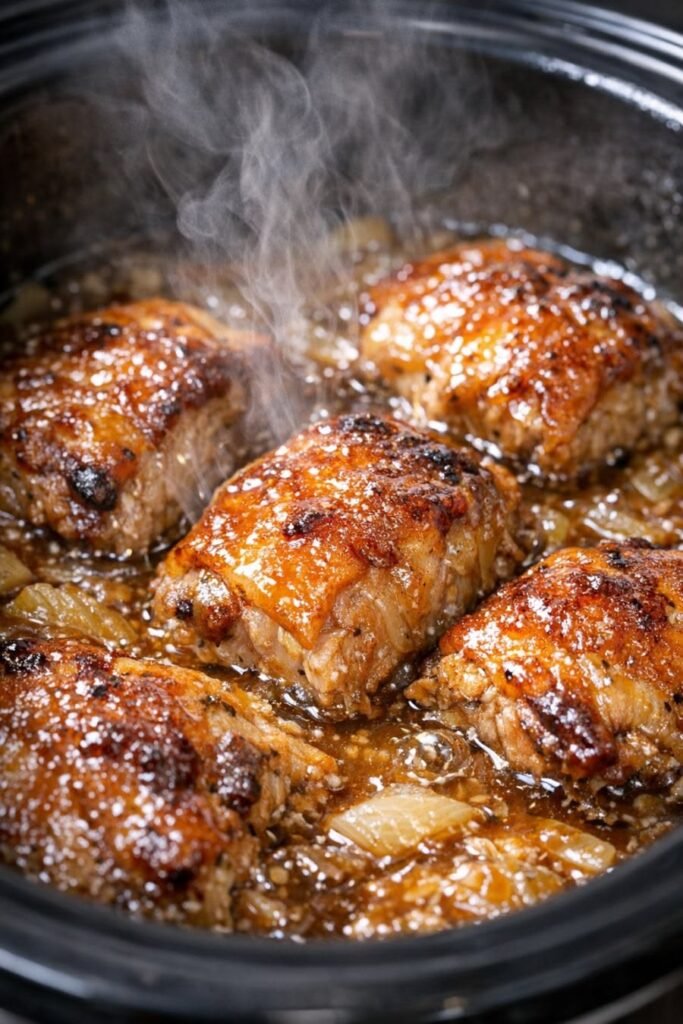
I usually reach for chicken thighs when I want something comforting without spending hours in the kitchen. They stay wonderfully juicy, and when you sear the skin properly before braising, you get that gorgeous golden, crispy top that makes everyone want the first piece.
Honestly, the caramelized onions might be my favorite part. They slowly cook in the same pan, soaking up all those delicious browned bits from the chicken. Add garlic, chicken broth, butter, and a few simple seasonings, and you end up with a rich, savory sauce that’s absolutely perfect spooned over mashed potatoes or rice.
The best part? Everything happens in one skillet. Less cleanup, lots of flavor.
Ingredients
For the Chicken
-
5–6 bone-in, skin-on chicken thighs
-
1½ teaspoons salt
-
1 teaspoon freshly ground black pepper
-
1 teaspoon paprika
-
1 teaspoon garlic powder
-
½ teaspoon onion powder
-
½ teaspoon dried thyme
-
2 tablespoons olive oil
For the Garlic and Onion Sauce
-
2 large yellow onions, thinly sliced
-
5–6 garlic cloves, minced
-
2 tablespoons butter
-
1 tablespoon all-purpose flour
-
1½ cups chicken broth
-
1 tablespoon Worcestershire sauce
-
1 teaspoon Dijon mustard
-
½ teaspoon dried thyme
-
½ teaspoon paprika
-
Salt and black pepper, to taste
-
1 tablespoon fresh parsley, chopped
How to Make Crispy Garlic-Braised Chicken Thighs
1. Pat the Chicken Dry
Start by patting the chicken thighs very well with paper towels.
This step seems small, but it’s important. Dry chicken skin browns much better than wet skin.
Season both sides generously with salt, black pepper, paprika, garlic powder, onion powder, and dried thyme.
Let the chicken sit for about 10 minutes while you prepare the other ingredients.
2. Sear the Chicken Until Golden
Heat the olive oil in a large oven-safe skillet over medium-high heat.
Place the chicken thighs in the skillet skin-side down.
Now comes the hard part: leave them alone!
Cook for about 6–8 minutes, or until the skin is deeply golden brown and crisp. Don’t constantly move or flip the chicken because that can prevent the skin from developing that beautiful crust.
Flip the chicken and cook for another 2–3 minutes.
Remove the chicken from the skillet and place it on a plate.
It doesn’t need to be cooked through yet. It will finish cooking in the oven.
3. Caramelize the Onions
Reduce the scrape up some of the browned bits from the bottom of the skillet. That’s where a lot of the flavor is hiding heat to medium and add the butter to the same skillet.
Add the sliced onions and cook for approximately 8–10 minutes, stirring occasionally.
As the onions cook, scrape up some of the browned bits from the bottom of the skillet. That’s where a lot of the flavor is hiding.
Once the onions are soft and golden, add the minced garlic.
Cook for another 30–60 seconds, just until fragrant.
I usually don’t rush this step. Giving the onions enough time to soften and brown makes the finished sauce so much more flavorful.
4. Make the Garlic Pan Sauce
Sprinkle the flour over the onions and stir well.
Cook for about 1 minute to remove the raw flour taste.
Slowly pour in the chicken broth while stirring continuously. The sauce should start becoming smooth and slightly thickened.
Add:
-
Worcestershire sauce
-
Dijon mustard
-
Dried thyme
-
Paprika
-
Black pepper
-
A little salt, if needed
Stir everything together and let the sauce simmer for about 2–3 minutes.
5. Add the Chicken Back
Nestle the seared chicken thighs into the onion sauce.
Make sure the crispy skin remains above the liquid. You want the chicken to braise in the flavorful sauce without soaking the skin completely.
This is the trick to getting tender chicken while keeping that beautiful golden top.
6. Bake Until Tender
Transfer the skillet to a preheated 400°F (200°C) oven.
Bake for approximately 25–35 minutes, depending on the size of your chicken thighs.
The chicken should reach an internal temperature of at least 165°F (74°C) in the thickest part.
For especially tender thighs, they can be cooked beyond this minimum temperature; chicken thighs generally become more tender as connective tissue breaks down with longer cooking.
7. Crisp the Skin
If the chicken skin needs a little extra color, switch the oven to broil for 1–3 minutes.
Watch it closely because the skin can go from beautifully browned to burnt surprisingly quickly.
Remove the skillet from the oven and sprinkle the chicken with fresh parsley.
And that’s it!
You’ve got crispy garlic chicken thighs swimming in a rich caramelized onion sauce.
Cooking Tips for the Best Chicken Thigh Moisture on the skin creates steam, while dry skin gets that delicious golden sear browned bits left behind after searing the chicken are pure flavor. The onions and sauce will pick them up as theys
1. Dry the chicken first
This is one of the easiest ways to improve crispy chicken skin. Moisture on the skin creates steam, while dry skin gets that delicious golden sear.
2. Don’t overcrowd the pan
Give the chicken enough space. If the pieces are packed tightly together, they may steam instead of sear.
3. Start skin-side down
Let the skin sit against the hot skillet without disturbing it. That’s how you develop the deep golden crust.
4. Don’t cover the crispy skin with sauce
Keep the liquid around the chicken rather than pouring it over the skin. Otherwise, that beautiful crispiness can disappear.
5. Use the same pan
Those browned bits left behind after searing the chicken are pure flavor. The onions and sauce will pick them up as they cook.
6. Check the chicken with a thermometer
Chicken is safely cooked when the thickest portion reaches 165°F (74°C). Avoid touching the bone when taking the temperature.
7. Let makes its own rich sauce, so I love serving it with something that can soak it all the chicken rest briefly
I usually let the chicken rest for about 5 minutes before serving. This also gives the sauce a moment to settle and thicken slightly.
What to Serve with Garlic-Braised Chicken
This chicken makes its own rich sauce, so I love serving it with something that can soak it all up.
Try it with:
-
Creamy mashed potatoes
-
Steamed white rice
-
Buttered egg noodles
-
Garlic mashed cauliflower
-
Roasted potatoes
-
Crusty French bread
-
Green beans
-
Roasted carrots
-
Steamed broccoli
-
A simple green salad
For a cozy Sunday dinner, I’d go with mashed potatoes + green beans + plenty of that onion gravy.
Storage and Reheating
Refrigerator
Store leftover chicken and sauce in an airtight container for up to 3–4 days.
Reheating
Reheat gently in a covered skillet over medium-low heat with a splash of chicken broth.
For the skin, place the chicken under the broiler or in a hot oven for a few minutes after reheating to bring some crispiness back.
Freezing
The cooked chicken and sauce can be frozen for up to about 3 months for best quality. Thaw overnight in the refrigerator before reheating.
Approximate Nutrition Information
Per serving, assuming 6 servings:
-
Calories: 430–480 kcal
-
Protein: 29–34 g
-
Fat: 30–34 g
-
Carbohydrates: 10–13 g
-
Fiber: 2–3 g
-
Sugar: 4–5 g
-
Sodium: 700–900 mg
Nutrition is an estimate and will vary depending on the size of the chicken thighs, amount of skin consumed, broth, butter, and other ingredients used.
Frequently Asked Questions
1. Can I use boneless chicken thighs?
Yes. Boneless, skinless thighs will work, although you won’t get the same crispy skin. They also cook faster, so start checking them earlier.
For the crispy version pictured here, bone-in, skin-on chicken thighs are the way to go.
2. Why isn’t my chicken skin crispy?
Usually, it’s one of three things: the chicken was too wet, the pan wasn’t hot enough, or the chicken was moved too frequently while searing.
Pat the chicken dry and allow the skin to sear undisturbed until deeply golden.
3. Can I make this without an oven-safe skillet?
Absolutely. Sear the chicken and make the sauce in your regular skillet, then transfer everything to a baking dish for the oven.
4. Can I add mushrooms?
Definitely! Sliced mushrooms would be delicious here. Brown them after the chicken is removed, then continue with the onions and sauce.
5. Can I make this recipe ahead of time?
Yes. You can make the chicken and sauce earlier in the day and refrigerate them. Reheat gently before serving and use the oven or broiler briefly to refresh the crispy skin.
Final Thoughts
If you’re looking for an easy chicken thigh dinner recipe that tastes like you spent all afternoon cooking, put this one on your list.
I love how simple the ingredients are, but the finished dish tastes anything but simple. The crispy chicken skin, sweet caramelized onions, garlicky pan sauce, and tender meat all work together beautifully.