
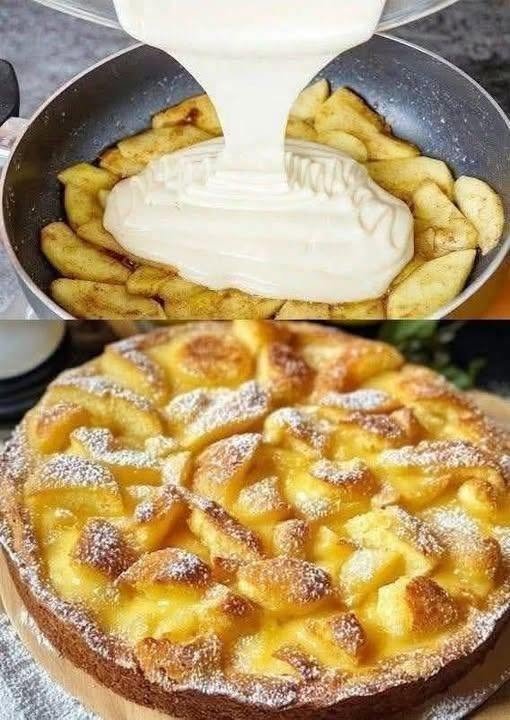
Honestly, this 3-apple pie has become one of my favorite quick desserts. I usually have the ingredients sitting in my kitchen already, and the best part is that you only need three apples. The preparation takes around 10 minutes, so there is very little fuss.
The apples become soft and caramelized around the edges while the simple batter bakes into something wonderfully creamy and golden. It isn’t quite a traditional pastry-crust apple pie; it’s more like a cross between an easy apple pie, French-style apple cake, and custard cake.
And that powdered sugar on top? Completely optional—but I almost always add it.
Ingredients
For the Apple Filling
- 3 medium apples
- 1 tablespoon butter
- 1 tablespoon granulated sugar
- ½ teaspoon ground cinnamon
- 1 teaspoon lemon juice
For the Quick Batter
- 2 large eggs
- ½ cup (100 g) granulated sugar
- ½ cup (120 ml) milk
- ½ cup (120 g) plain yogurt
- 1 teaspoon vanilla extract
- 1 cup (125 g) all-purpose flour
- 1½ teaspoons baking powder
- Pinch of salt
For Finishing
- Powdered sugar, for dusting
- A little butter or oil for greasing the pan
How to Make This Easy 3-Apple Pie
1. Prepare the apples
Peel the apples if you prefer a softer texture, although I sometimes leave the skins on when I’m in a hurry.
Cut them into thin wedges or slices. You don’t have to make them perfectly uniform—this is a home-cooked dessert, after all.
Toss the apples with the lemon juice and cinnamon.
2. Quickly cook the apples
Melt the butter in a large oven-safe skillet over medium heat.
Add the sliced apples and sprinkle over the tablespoon of sugar. Cook for about 3–4 minutes, stirring occasionally.
You aren’t trying to completely cook the apples. I usually just soften them slightly and let them pick up a little golden color.
3. Make the batter
While the apples are cooking, whisk the eggs and sugar together in a bowl.
Add the milk, yogurt, and vanilla. Whisk until smooth.
Add the flour, baking powder, and salt. Stir just until everything comes together.
Don’t overmix. A few tiny lumps are perfectly fine.
4. Pour over the apples
Spread the apples evenly around the skillet.
Pour the batter over the top, making sure it reaches between the apple pieces.
At this point, it already smells pretty amazing.
5. Bake
Place the skillet in a preheated 350°F (175°C) oven.
Bake for approximately 30–40 minutes, or until the top is puffed, golden brown, and the center is set.
The exact baking time can vary depending on the size and depth of your pan.
6. Cool and dust
Let the apple pie rest for about 10 minutes after taking it from the oven.
Then dust generously with powdered sugar.
I know it’s tempting to cut into it immediately, but giving it those few minutes to settle makes the texture much nicer.
Cooking Tips for the Best Apple Pie
Choose the right apples
I like apples that are naturally sweet-tart and hold their shape during cooking. Honeycrisp, Pink Lady, Granny Smith, or Braeburn all work nicely.
Don’t overcook the apples first
The apples will continue cooking in the oven. A few minutes in the skillet is enough to soften them and develop flavor.
Don’t overmix the batter
Once the flour goes in, mix only until combined. Overmixing can make the finished pie heavier and less tender.
Use a wide pan
A 9- or 10-inch oven-safe skillet works particularly well because the apples have room to spread out and the batter cooks evenly.
Watch the final few minutes
Every oven is slightly different. If the top is becoming deeply golden but the center still needs time, loosely cover it with foil and continue baking.
Let it rest
This little step makes a surprisingly big difference. The warm filling and soft cake-like batter firm up as the pie cools.
Serving Suggestions
This apple pie is delicious warm, at room temperature, or even chilled.
My favorite way to serve it is slightly warm with a scoop of vanilla ice cream. The cold, creamy ice cream melting over the warm apples is hard to beat.
You can also serve it with:
- A dusting of powdered sugar
- Whipped cream
- Greek yogurt
- A drizzle of caramel sauce
- A sprinkle of chopped walnuts or pecans
- A little extra cinnamon
For breakfast or afternoon coffee, I honestly don’t even need anything on top.
Approximate Nutrition Information
Per serving, based on 8 servings. Values are estimates and will vary according to the exact ingredients and portion size.
- Calories: ~230 kcal
- Carbohydrates: ~38 g
- Protein: ~5 g
- Fat: ~7 g
- Saturated fat: ~3 g
- Fiber: ~2 g
- Sugar: ~23 g
- Sodium: ~120 mg
Frequently Asked Questions
1. Can I make this apple pie without peeling the apples?
Absolutely. I often leave the skins on when I want to save a little time. Just wash the apples well and slice them thinly. The skins will soften as they bake.
2. Can I use more than 3 apples?
Yes. You can use 4 apples if they’re small or you simply want a fruitier pie. Just avoid filling the pan too high, because too many apples can make the center take longer to set.
3. Can I prepare this recipe without a skillet?
Yes. Cook the apples in a regular frying pan, then transfer them to a greased 9-inch baking dish. Pour the batter over them and bake as directed.
4. How do I know when the apple pie is done?
The top should be golden and puffed, while the center should look set rather than liquid. A toothpick inserted into the cake portion should come out mostly clean.
5. Can I make this apple pie ahead of time?
Definitely. It keeps well for about 2–3 days in the refrigerator, covered tightly. I like reheating individual slices gently before serving.
Final Thoughts
If you have three apples and about 10 minutes to spare, give this recipe a try.
I love that it doesn’t require rolling pastry, making a complicated filling, or dirtying half the kitchen. You simply soften the apples, whisk together the batter, pour it over everything, and let the oven do the hard work.
And honestly, that’s exactly what I want from a homemade dessert on a busy day: simple ingredients, minimal preparation, and a warm apple-filled treat that makes the whole kitchen smell incredible.